The Maker Mining Rig
-
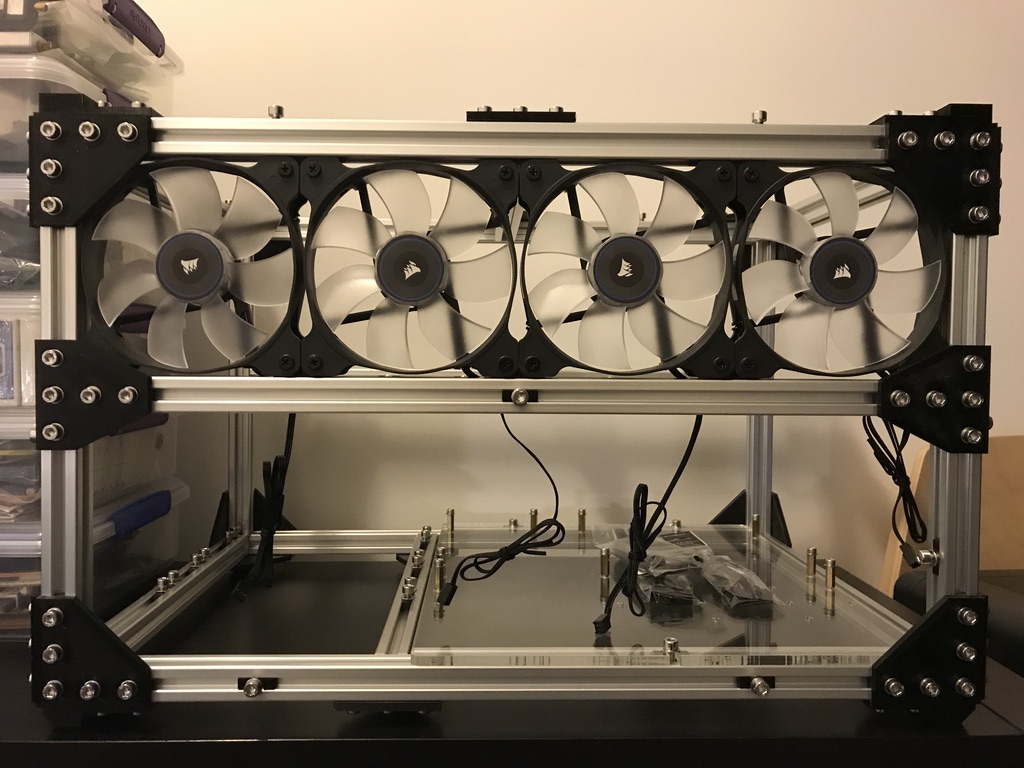
Frame front view
-
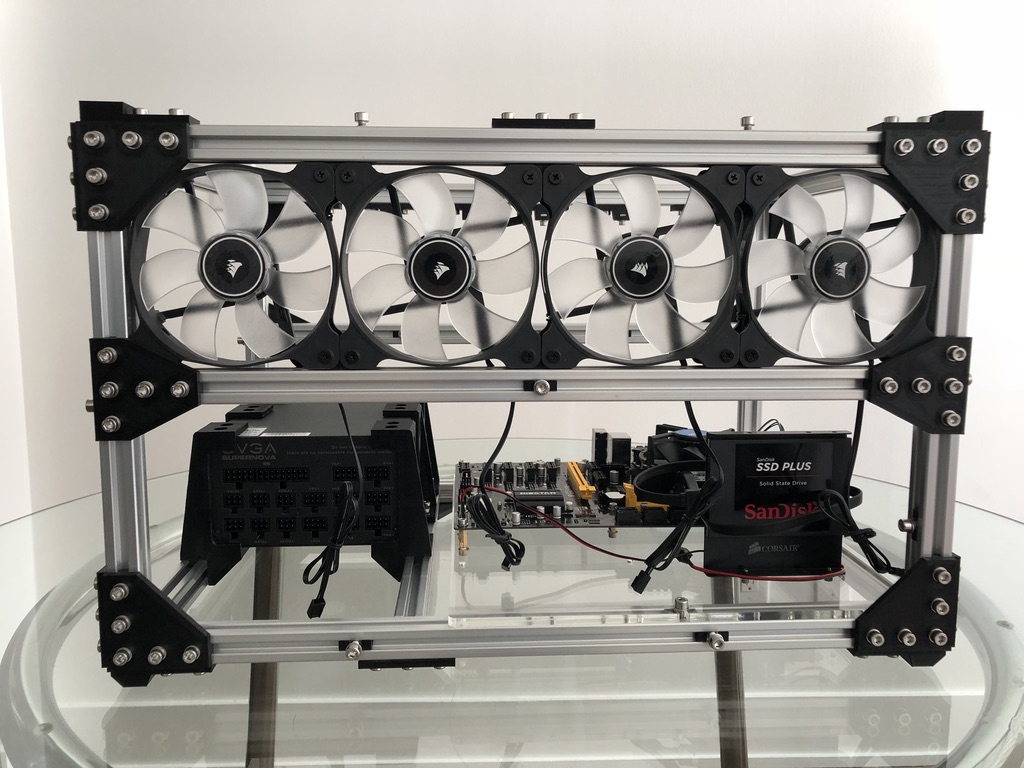
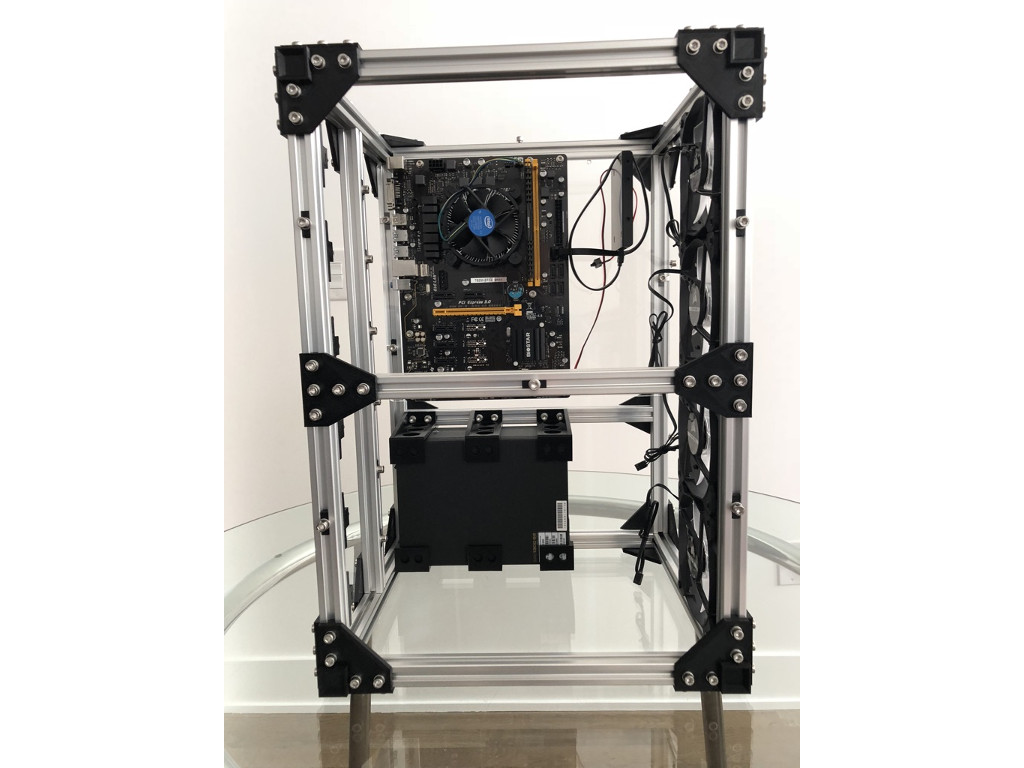
Mining rig front view - partial build
-
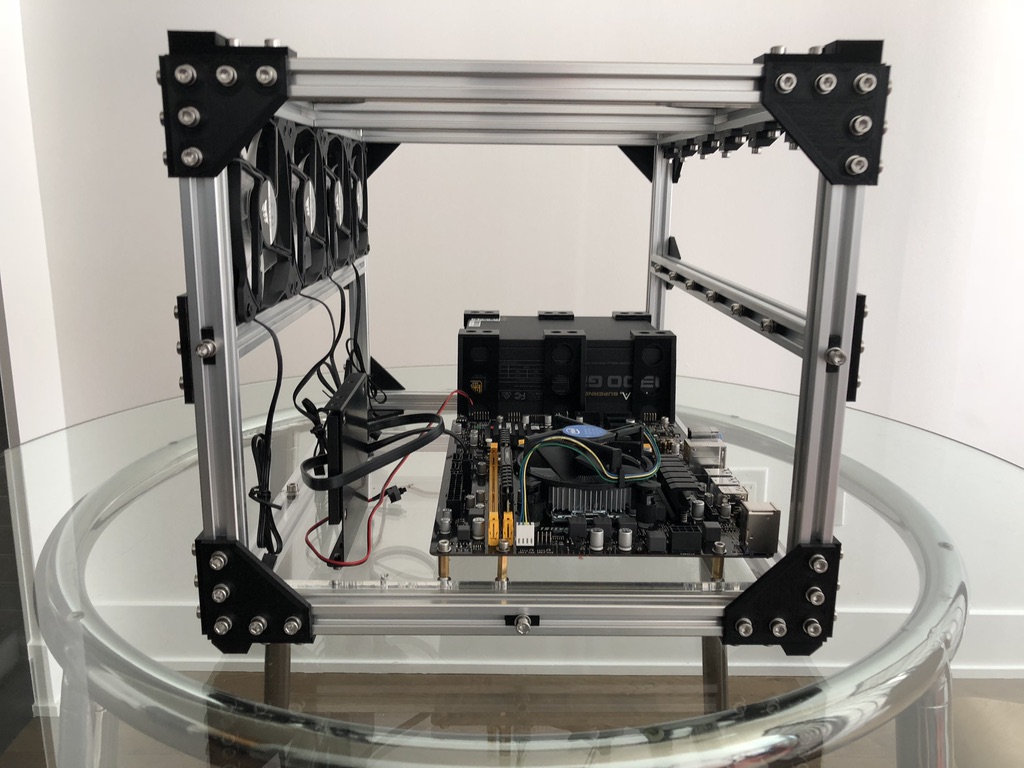
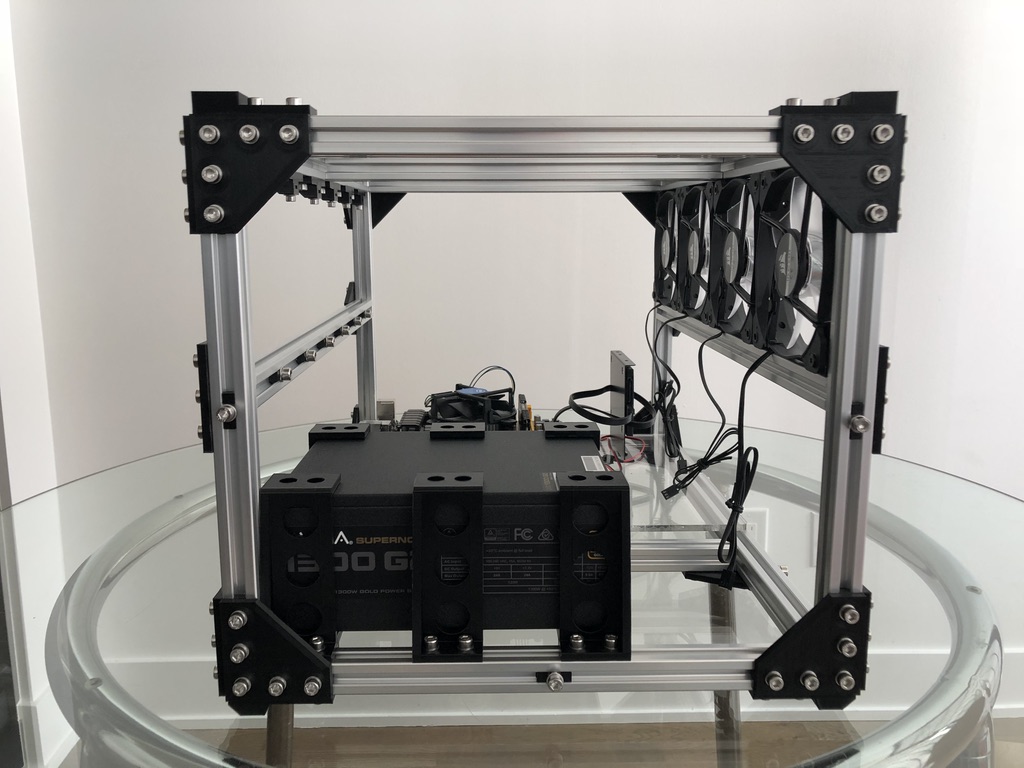
Mining rig side view - partial build
-
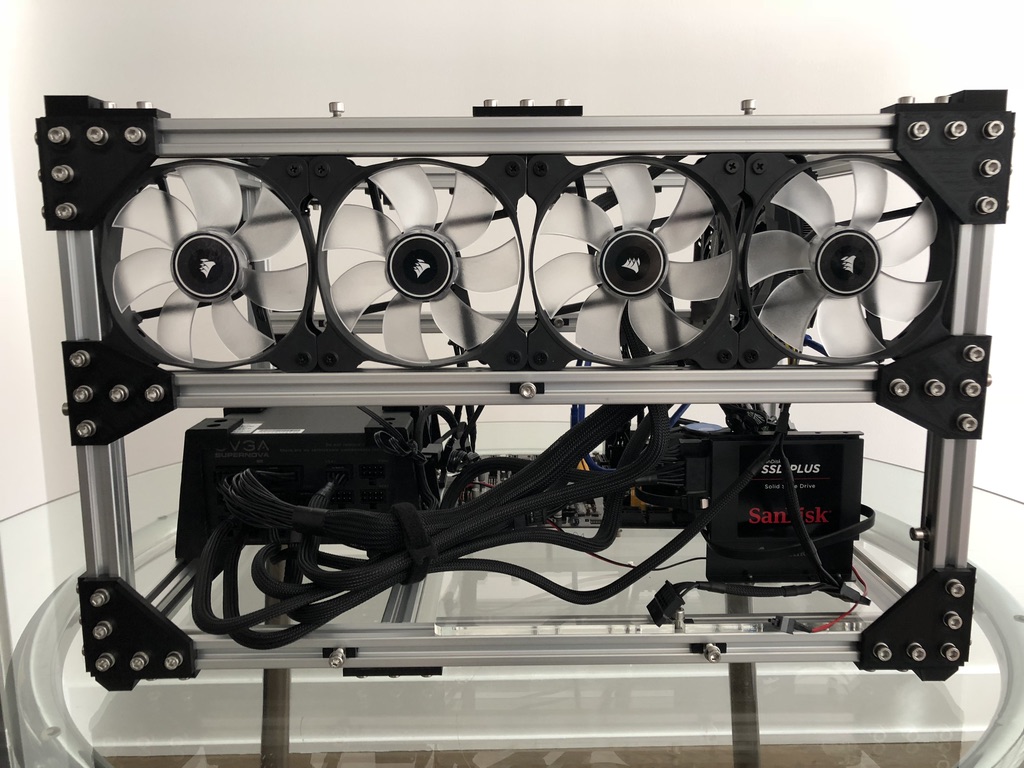
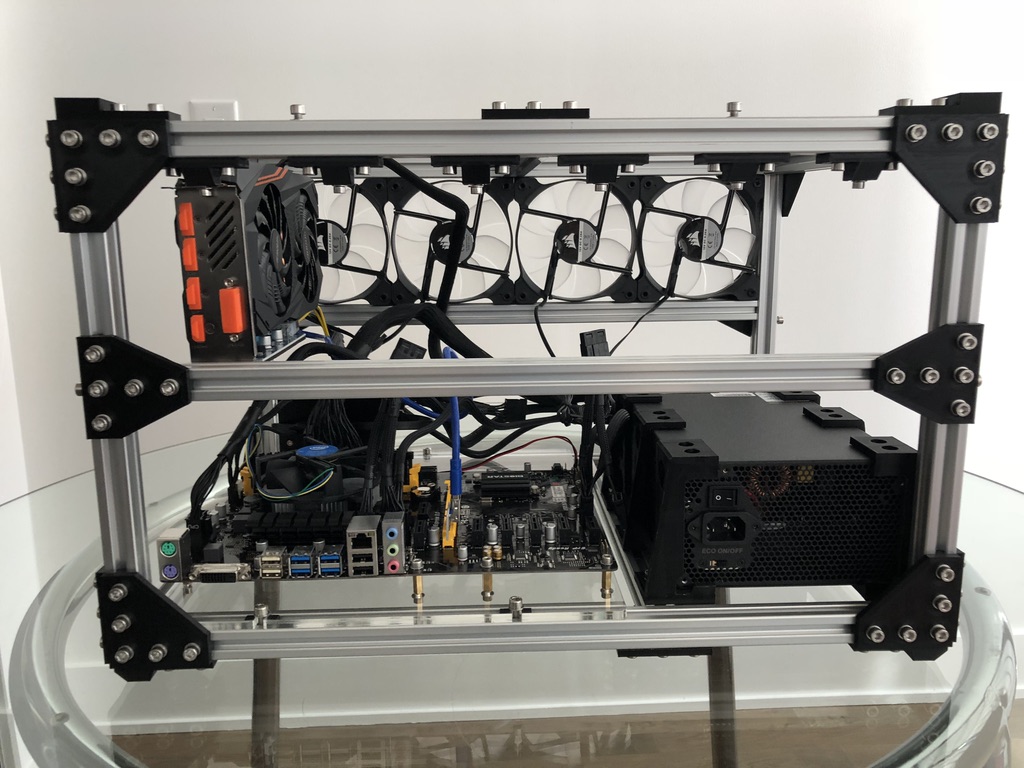
Mining rig rear view - partial build
-
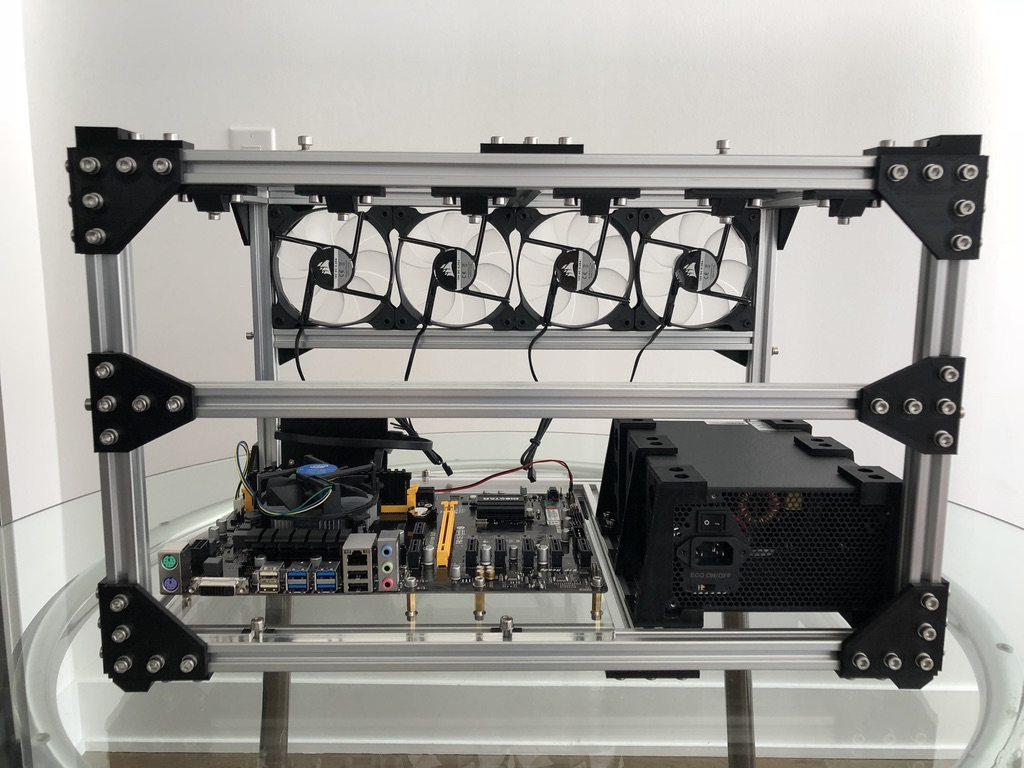
Mining rig side view - partial build
-
Mining rig top view - partial build
-
Mining rig front view - partial view
-
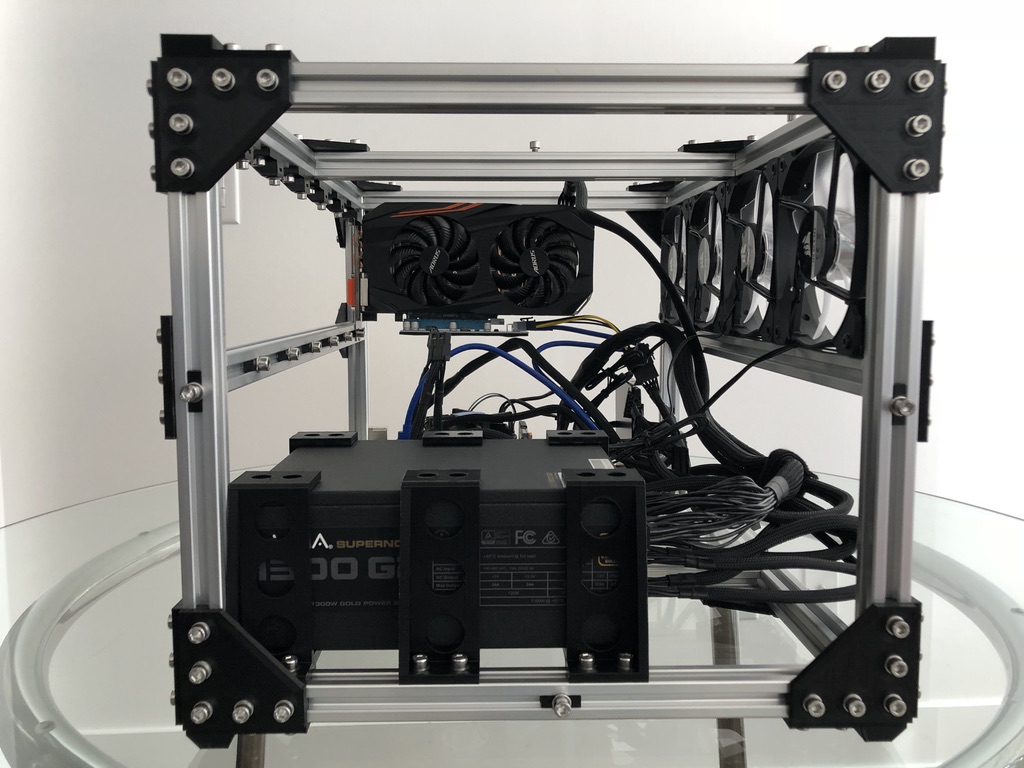
Mining rig side view
-
Mining rig rear view - partial build
-
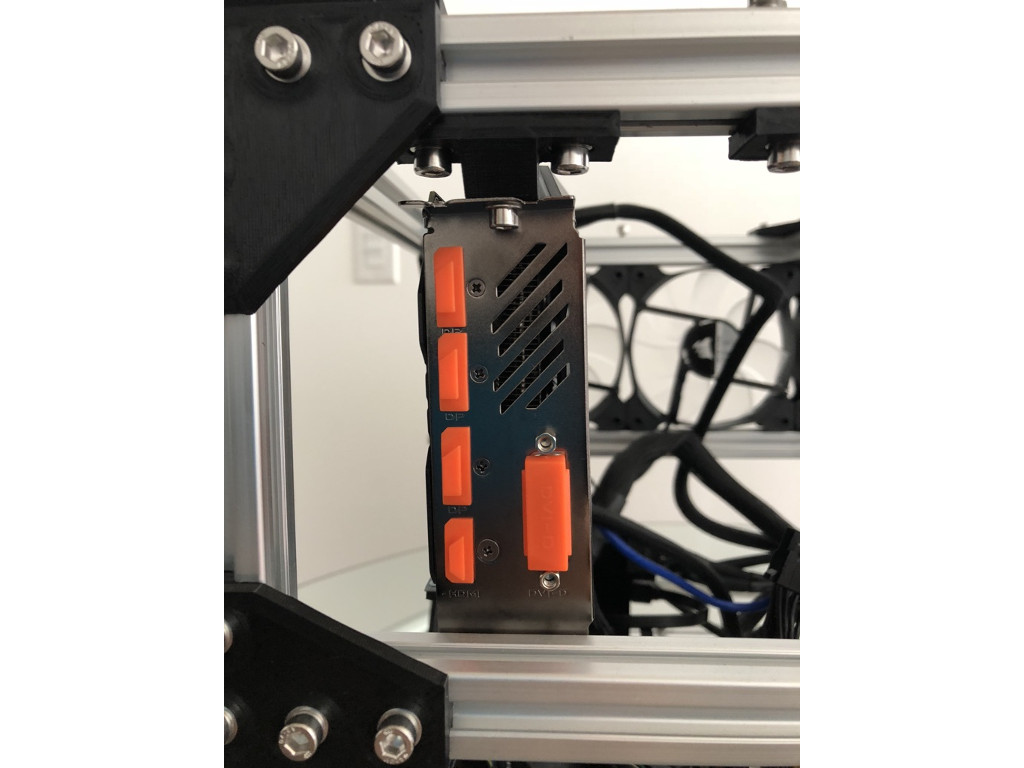
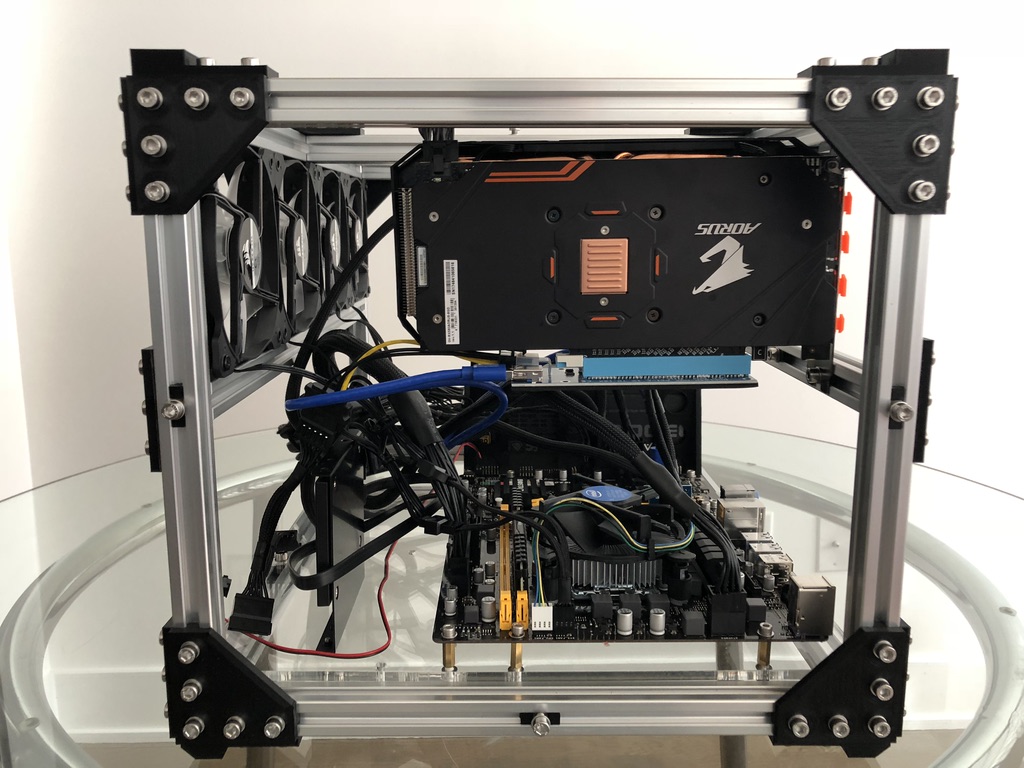
Mining rig rear view - GPU mount detail
-
Mining rig side view - partial build
-
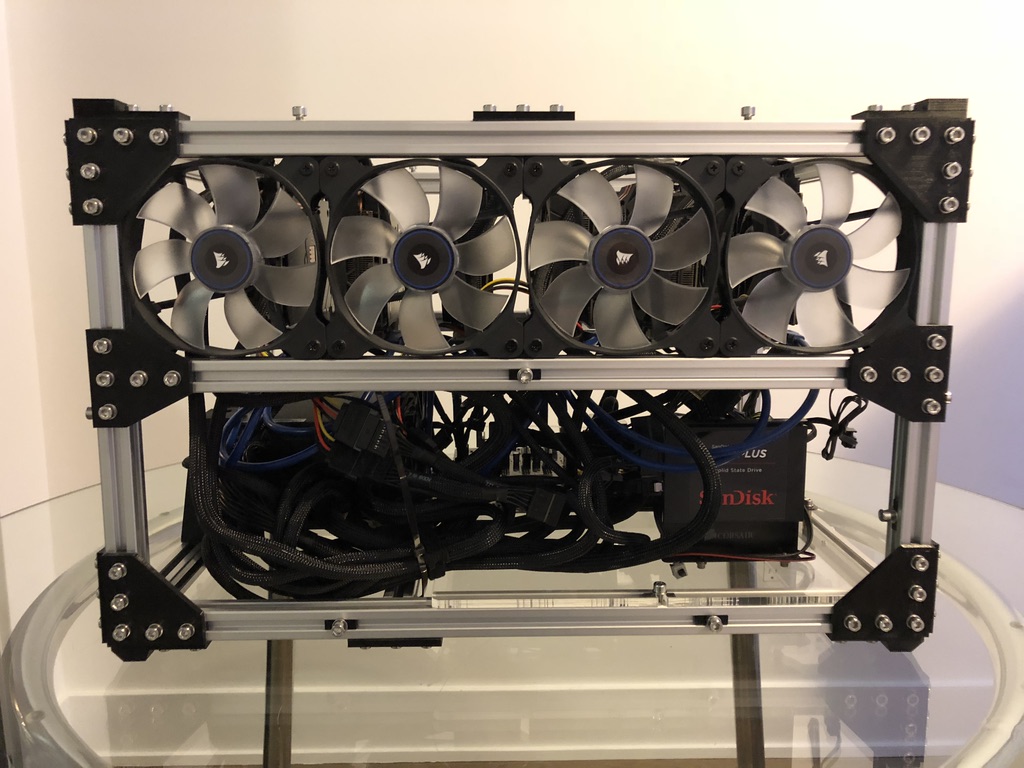
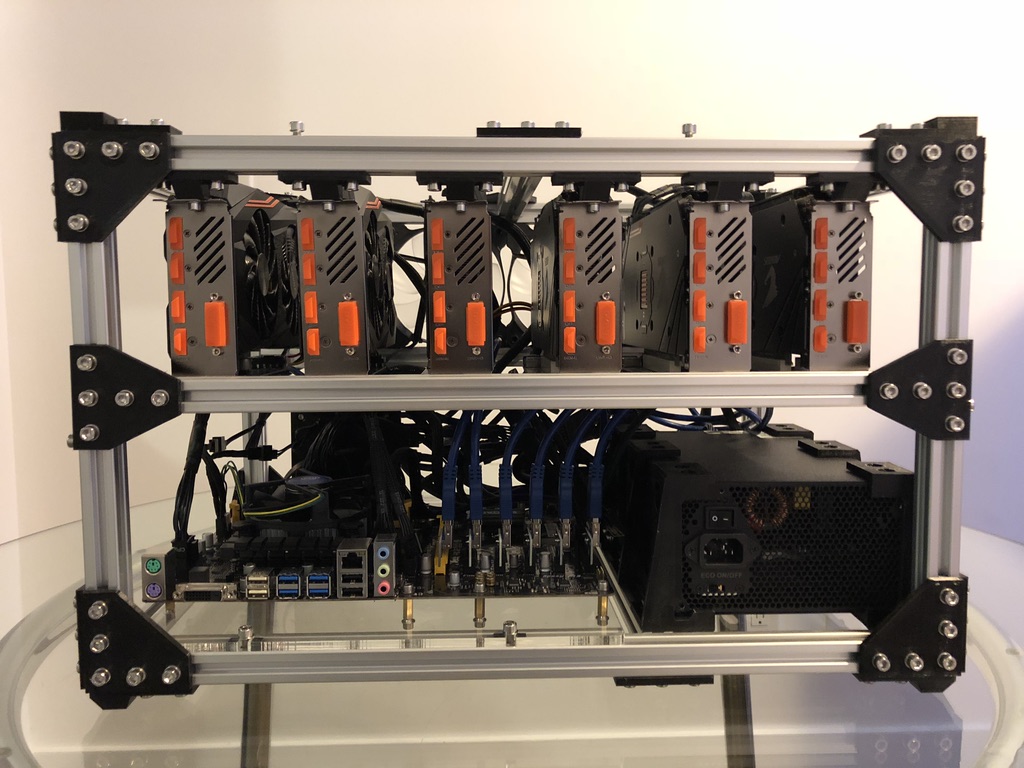
Mining rig front view
-

Mining rig side view
-
Mining rig top view
-
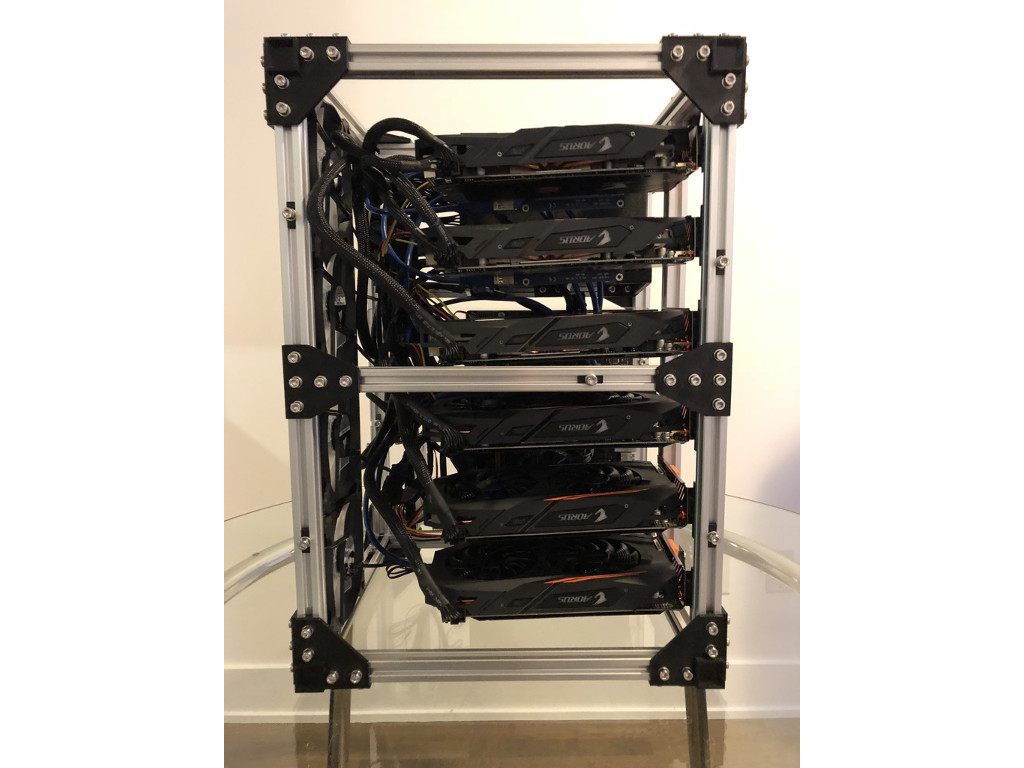
Mining rig rear view
When we began exploring the cryptocurrency mining space, it was difficult to find a stackable rig design that was not too expensive to build/buy and easy to maintain.
As a result, we came up with a maker design that fits all of these requirements. The design makes use of aluminum extrusion and 3D printed joints. We put our Original Prusa MK2 to good work, and after three iterations, a few meters of aluminum extrusion, and a couple of spools of 3D printing filament, we created the design below.
The design consists of a stackable air cooled frame that can accommodate four 120mm fans, a PSU, an ATX motherboard, and up to six GPUs.
We favor a modular approach, a farm with smaller units, where each mining rig can be serviced without bringing down a significant part of the production capacity.
The Rig Frame
Aluminum Extrusion
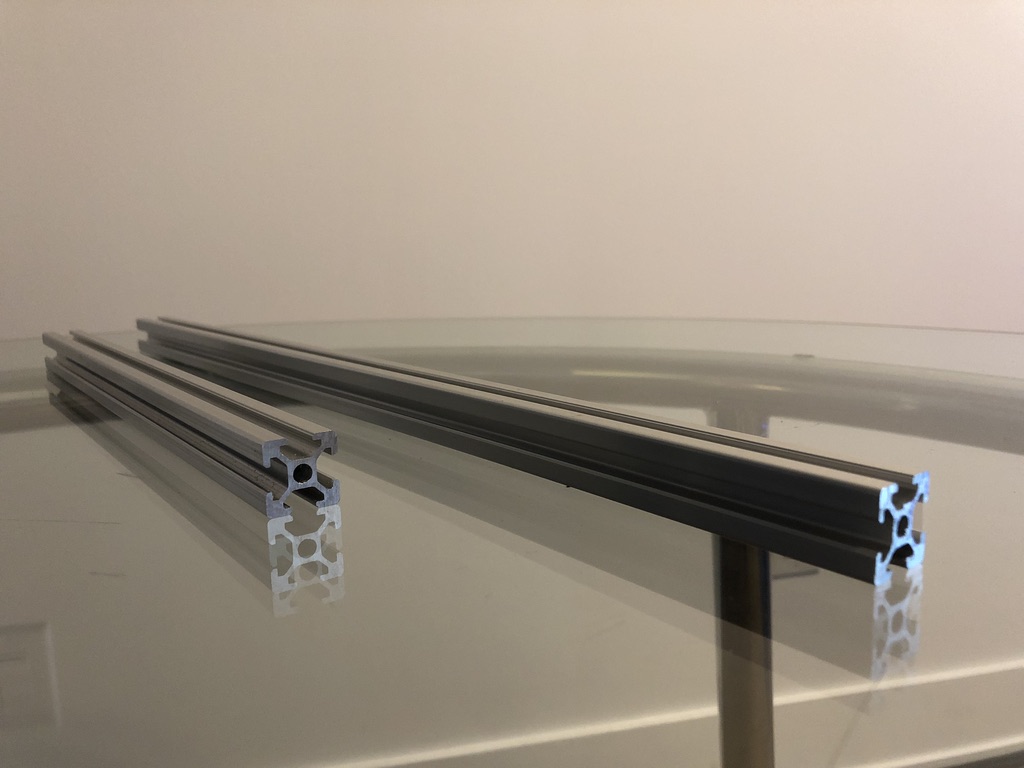
Aluminum extrusion is easy to find and quite affordable (1m can be somewhere in the $10–15 range). Most sellers will cut the aluminum at the required length before shipping it to you. The current rig design uses six 480mm and ten 320mm aluminum extrusions. This design allows four 120mm fans to fit in front and ensures that the rig can fit pretty much any NVIDIA or AMD GPU out there.
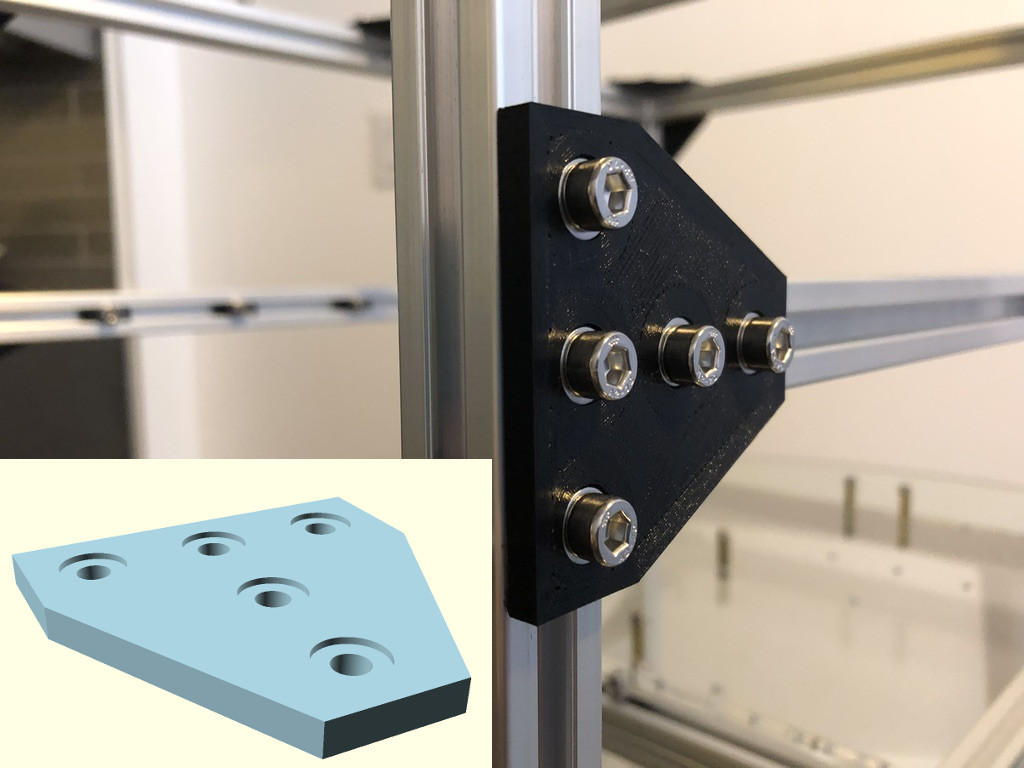
L-Joints
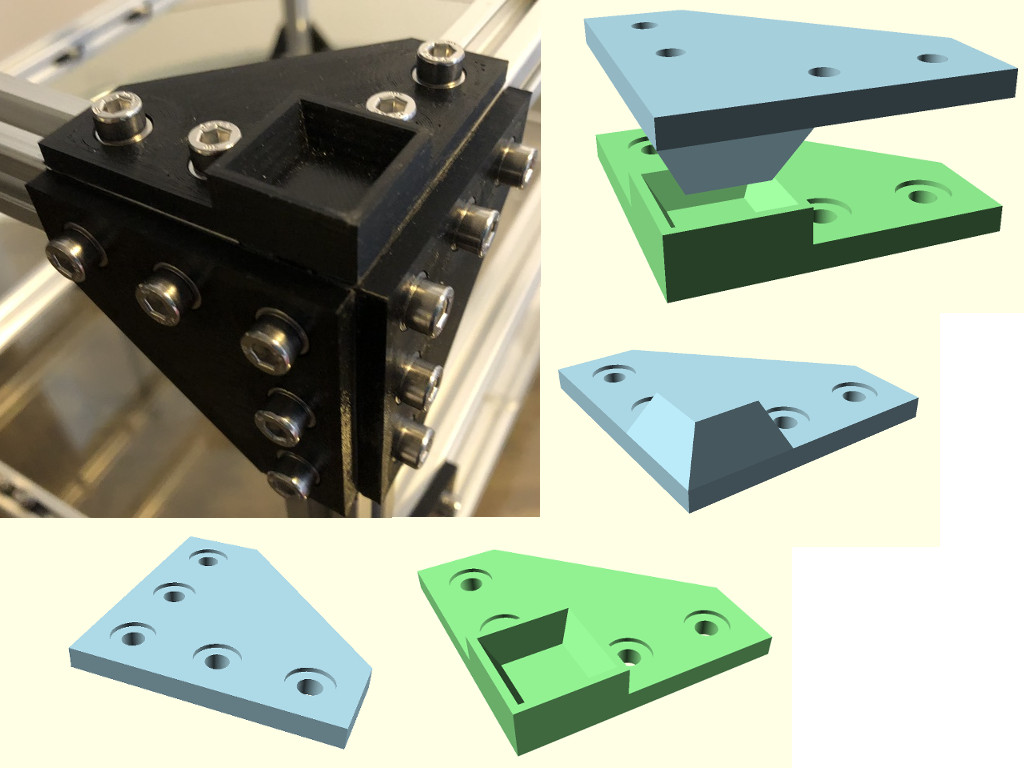
L-joints are used to assemble the facets of the rig frame. The design of the top/bottom l-joints allows the rigs to be stacked on top of each other. The current rig design uses 16 l-joints, four top l-joints, and four bottom l-joints. The joints are designed for M5x10mm screws. We recommend using M5 washers as well.
Slic3r settings:
Filament: PLA
Layer: 0.2 mm
Perimeters: 10
Top layers: 5
Bottom layers: 5
Infill: 30%
download l-joint STL file
SHA256: a5459cfe6bb883e1c94d7e718e88104471f5a321a43a14b62d4b2ece5fb2bf73
download top l-joint STL file
SHA256: 8b0ce759b7704b12857d99eb06ffffb59f7a7e19e01c295ff01e450d5627fa4b
download bottom l-joint STL file
SHA256: ffa930bd0866cb745c2e8131da2ff7977310172f7e7751fd87d17b3ce7a91198
T-Joint
The current rig design requires eight t-joints for the PSU, cooling fan, and GPU support.
Slic3r settings:
Filament: PLA
Layer: 0.2 mm
Perimeters: 10
Top layers: 5
Bottom layers: 5
Infill: 30%
download t-joint STL file
SHA256: fc4d3595ec293de98f8e00d6b64cda59b1460b574f22b1d189552e06a189a902
PSU Mounts
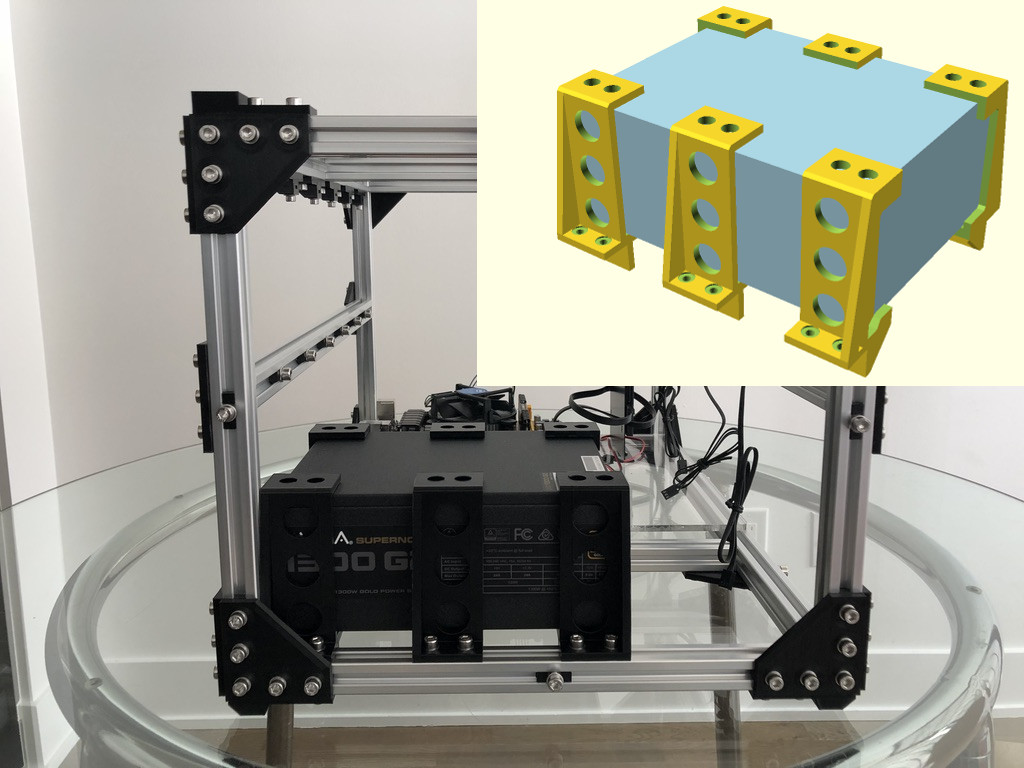
The PSU unit is attached to the rig frame with six PSU mounts. Each PSU mount is designed for M5x10mm screws. We recommend using M5 washers as well. The mounts can accommodate PSU of variable lengths.
Slic3r settings:
Filament: PLA
Layer: 0.2 mm
Perimeters: 10
Top layers: 5
Bottom layers: 5
Infill: 30%
download middle PSU mount STL file
SHA256: ee5da031d4e780fa5f8660aa59901ef189e0e615df58db948ee49621df7f2f17
download front PSU mount STL file
SHA256: 9d7fc2ef19aaf333a3933e3590aa17b93fc57c1a2a9641b162a3c180018e7c3d
download back PSU mount STL file
SHA256: e735d07f372a8cb61911a2fe2aa7978d26008c3eccc8b01ba156a118b57152f0
Power Switch Mount
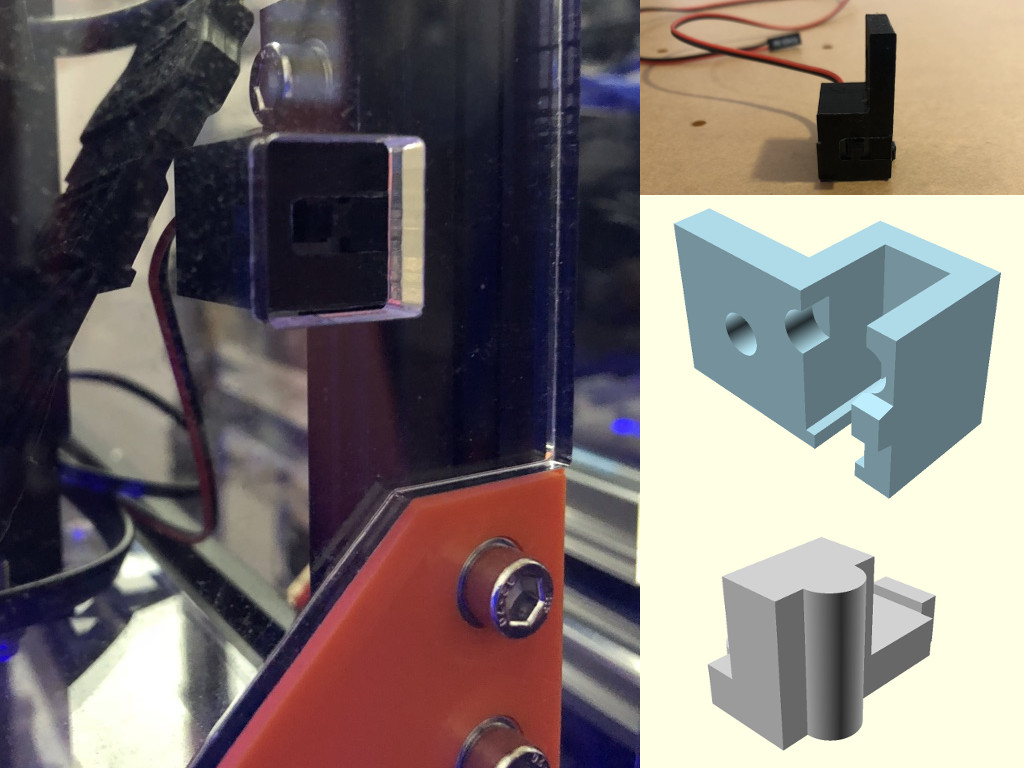
The switch mount is optional. We do think it is more convenient to install the switch instead of shorting the power pins on the motherboard every time you are booting up your rig.
Slic3r settings:
Filament: PLA
Layer: 0.1 mm
Perimeters: 10
Top layers: 10
Bottom layers: 10
Infill: 30%
download power switch mount STL file
SHA256: e5ea1afd25acd0bae49fe0bd131d116c6896d9cddec8923b874105920fa0fe13
download power switch mount STL file
SHA256: 1a79539065abbf36d65c7a2ebd681cdede16920171785e36c6985de7ad831688
T-Slot Fan Mount
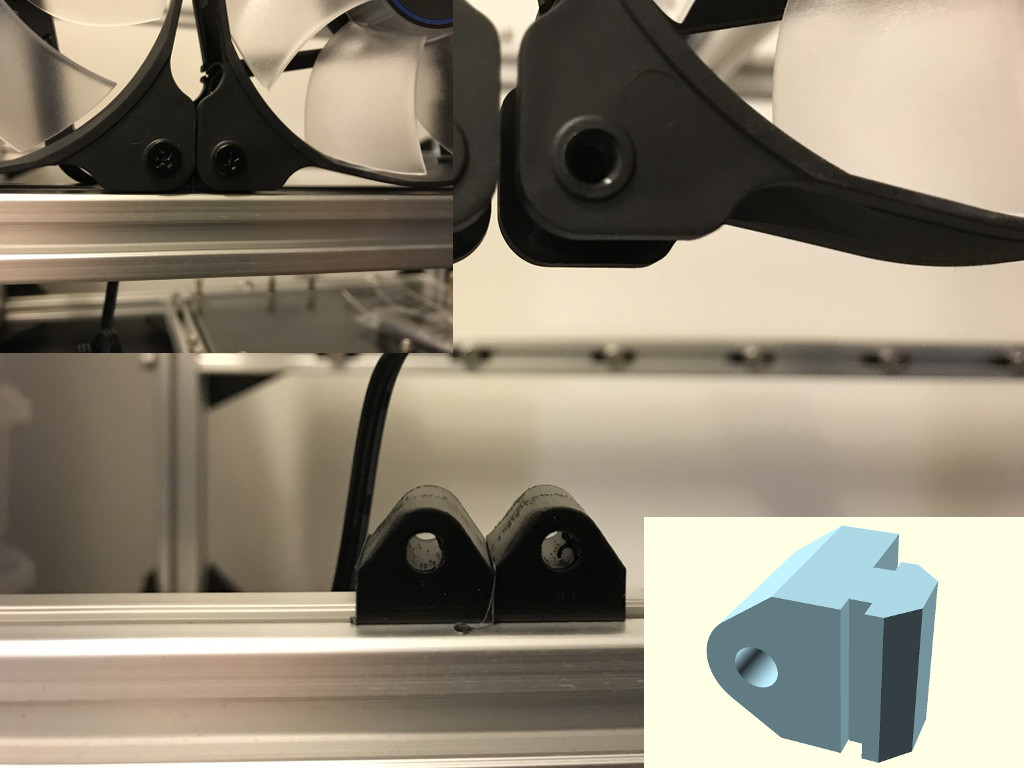
Fans are attached to the front of the frame. The current rig design uses the standard 120mm fans. The fans must be installed so that the air flow is directed towards the rear of the rig. Each fan requires four mounts.
Slic3r settings:
Filament: PLA
Layer: 0.1 mm
Perimeters: 10
Top layers: 10
Bottom layers: 10
Infill: 30%
download t-slot fan mount STL file
SHA256: 3764d7154907a8842237a058215061424fc59f6d6fecfb067c393b1bff98a79b
GPU Mount
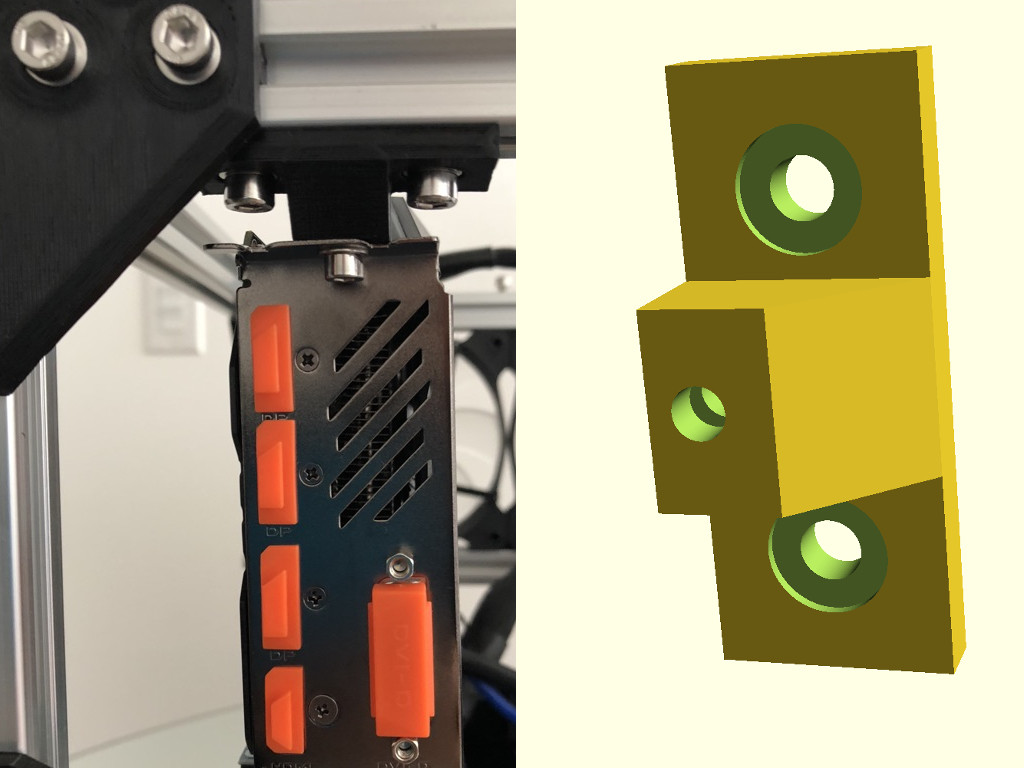
GPUs are mounted in the rear of the rig frame. The GPU mount allows a vertical clearance between the GPU and the top panel of the rig. Each GPU mount requires two M5x10mm and one M4x10mm screws. We recommend using M5 and M4 washers as well. The GPU is fastened to the middle rear extrusion with an M5x6mm screw and washer.
Slic3r settings:
Filament: PLA
Layer: 0.1 mm
Perimeters: 10
Top layers: 10
Bottom layers: 10
Infill: 30%
download GPU mount STL file
SHA256: 3f7fd66f4c41449473b7068c0b01d2bb1b944c3e953bbedfe81cfd4aec049267
download GPU mount t-slot nut STL file
SHA256: 0a106788a6df16cc71f5c52ea47a70c41f904bb13f3d5b150770ec31677a1629
T-Slot Nuts with 1/2/3 Holes
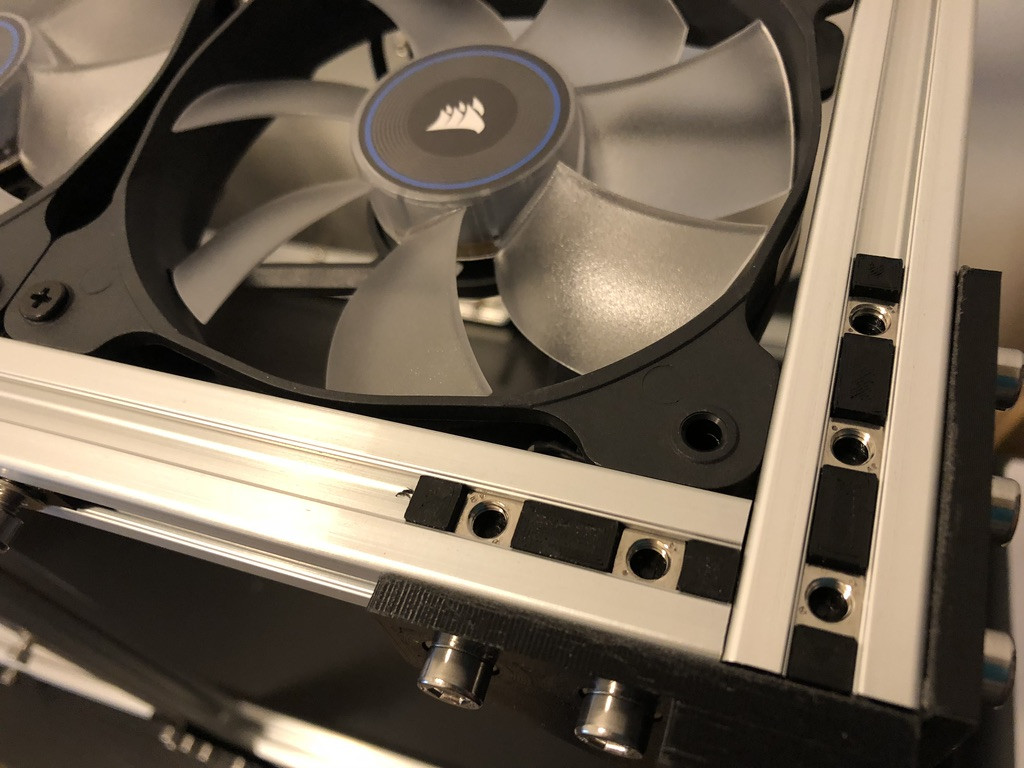
The 3D printed t-slot nuts are a cheaper alternative to metal nuts. They fit standard M5 square nuts.
Slic3r settings:
Filament: PLA
Layer: 0.1 mm
Perimeters: 10
Top layers: 10
Bottom layers: 10
Infill: 30%
download t-slot nut 1-hole STL file
SHA256: 569fe78cb0bb8555077331e9050ba6be6072f29a9b960eec19258d8ff8115dfe
download t-slot nut 2-hole STL file
SHA256: 221c14080bb7e0d06320f3e4bfc3d8999b362c3195e794928b7e165fc3a8be6d
download t-slot nut 3-hole STL file
SHA256: 8fd9103334deac06ed37fcc8d01b61908e290aba6bb867ec4968612792dd76cd
Panels
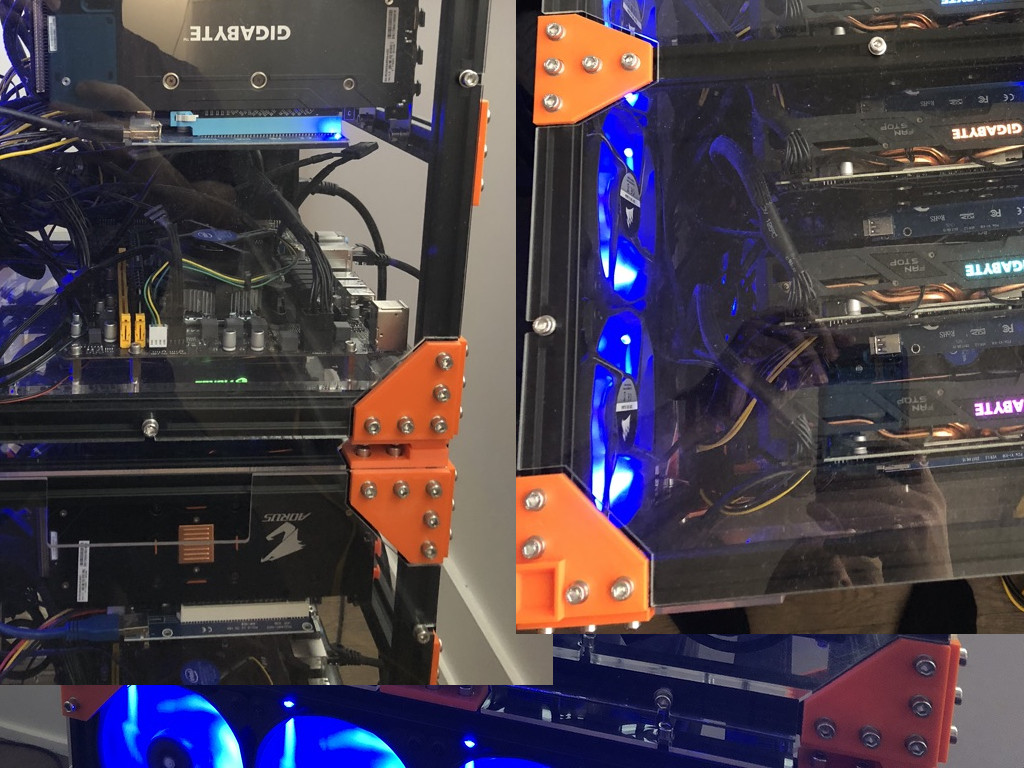
The panels minimize the loss of the cooling air flow (which gets deflected by the GPUs and the VGA cables). Also, they help with soundproofing, so the noise produced by the GPU fans is reduced considerably. We use laser cut clear acrylic panels for our farm. Concerned about that? Well, the melting point for acrylic is close to 160 degrees Celsius. The GPUs run at about 75 degrees Celsius and the rigs can be configured to shutdown if the temperature gets to 80 degrees Celsius.
download mobo mount SVG file
SHA256: d24e9c7cf178d47cf5741e9a83746c84e711ec017b746df0fbe7b5b9b324497c
download front panel SVG file
SHA256: 103668de8e9ea518ab841908f846f4dc7f676158ec2432b267ed6d545284ea26
download top panel SVG file
SHA256: 058b6145e0218c6e4cfc220abb089418ebcb57942677ac1361774ba6698e3db1
download side panel SVG file
SHA256: 0a18080fd101e1aa3df7a7c3be0313d8032ea28413dc6fe6d8e5833229b475de
Contact us by mail
-
20-260 Adelaide Street East
Toronto Ontario M5A 1N1
Canada
Contact us online
Support us
- 1BFAxjiBisPgh9SJt1S4E6P8qswC2CaN9R
- 0xF22c5968548f1fd2245BF0188FcFC684Bb8413ef
- LcJQuWXWKbJuszsainR7Y5TkwwyHY4kLKz